
By Kathy Rose

The majority of our Bread & Butter Shih Tzu clients request a “puppy cut”, meaning anything from a shave to a scissor all over, with a styled head. Our favorites, however, are the clients that want to keep their drop coats long and flowing.
These members of our Bread & Butter list generally schedule weekly visits for maintenance. Week one is spa bath: shampoo, condition, nail trim, ear cleaning, blow dry, and bow. Week two is spa maintenance: everything in spa bath but also includes sanitary, pad trimming and eyes trimmed. Week three is Spa Bath again. Week four is Spa Style. This includes everything in spa maintenance plus trimming of silhouette rounding of feet and tidying everything up all over.

Fig.1) Separate the coat using clips and then use a flat iron to straighten a wavy coat. A heat protectant hair or coat product can be lightly misted onto the coat before flat ironing. A coat that is not too wavy and that is dried properly will not need to be flat ironed on a pet dog.
Squeeze a dime sized drop of coat smoothing serum into the palm of your hand. A little bit of product goes a long way so use it sparingly. Rub your hands together and distribute the serum into the coat by working your hands gently up through the coat layers.
Fig.2) To create bevels on the front feet: place one hand on the lower leg at the metacarpus bone (wrist), and while holding the coat above your hand, lift the foot off of the table. Comb the coat below your hand downward over the foot.
Fig.3) Keep the foot elevated and then continue to hold the longer coat up and out of the way, use curved shears to round the foot. Do not expose the toenail.
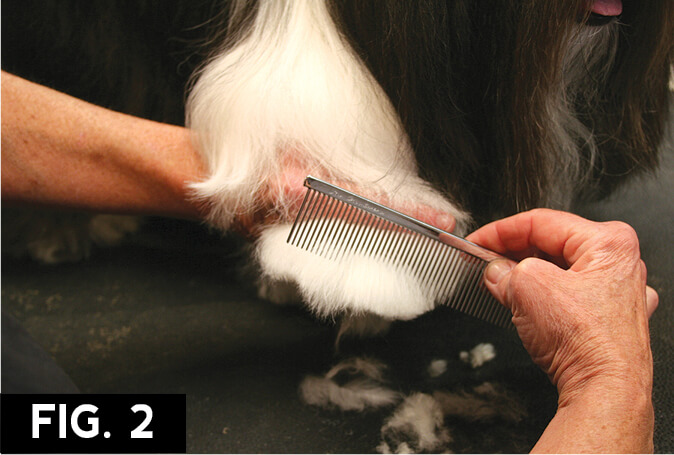
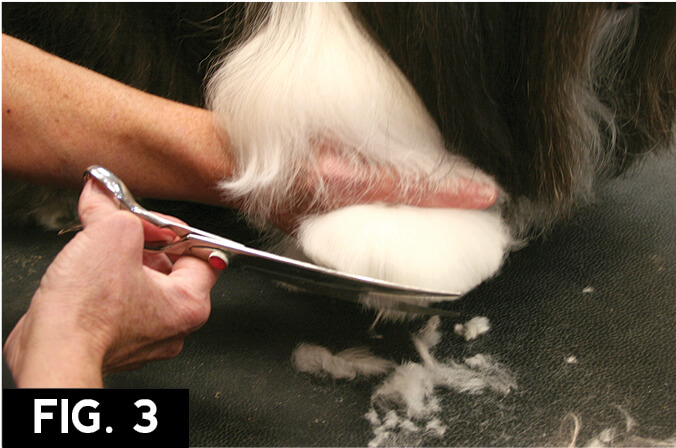

Fig.4) Place the foot onto the table and lift the long coat out of the way. Make sure that the dog is standing with her head upright and neck extended and then scissor around the foot. Release the longer coat a little at a time and continue trimming around the foot to create bevels. If the dog is slouching, then the longer coat will fall below the level where you wish to trim.
Fig.5) Create bevels on the hind feet following a similar procedure as the front feet. Lift the outer leg coat up and out of the way, use curved shears angled downward from below the hock to the table, then trim around the rear foot.
Release the outer coat a little at a time and comb it downward and then trim until the bevels on the rear feet are created.

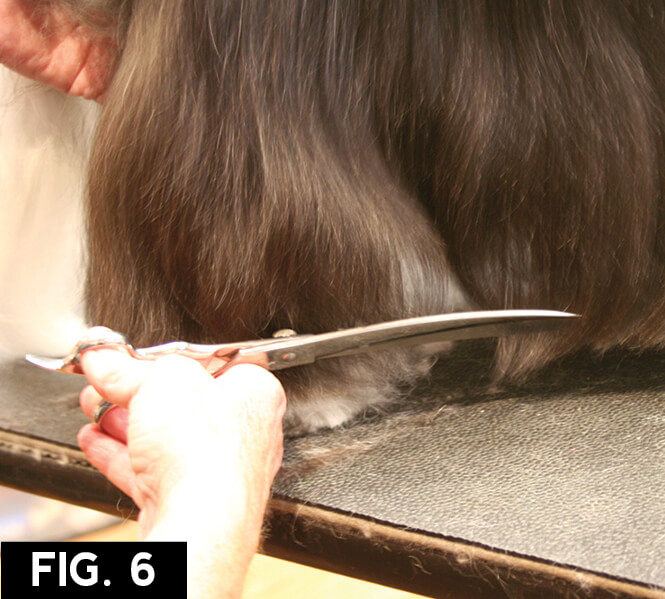
Fig.6) Invert the curved shears in a scooping technique and trim a very slight arch in the loin, shaping the underline. Carry this underline through to the front feet.
A discussion should take place between client and groomer regarding trimming the eye corners close or keeping them long. Once the eye corners are trimmed, a commitment must be made to keep them trimmed regularly, as the hair will grow upward toward the eyes. Keeping this coat long requires more cleaning maintenance on the part of the client, but the long coat on the nose bridge and eye corners provides a more natural appearance.
Fig.7) Use thinning shears to closely trim the eye corners and nose bridge. Use a clipper with a 10 or 15 blade to trim the loose hairs around the lips.
The topknot banding procedures depend upon the density, length, and condition of the topknot coat, as well as client preference. This pet dog has very sparse topknot coat so a child’s bungee type hair band is used to pull up the topknot in one single knot. This single band method is the easiest for clients to do themselves.
Fig.8) For a full topknot, two bands may be required. Comb the topknot coat from the outer eye corner to the ear, then part across the top skull from ear to ear. Next, split the coat into two sections across the top skull and secure the front portion with a latex band. Place the bow on this band.
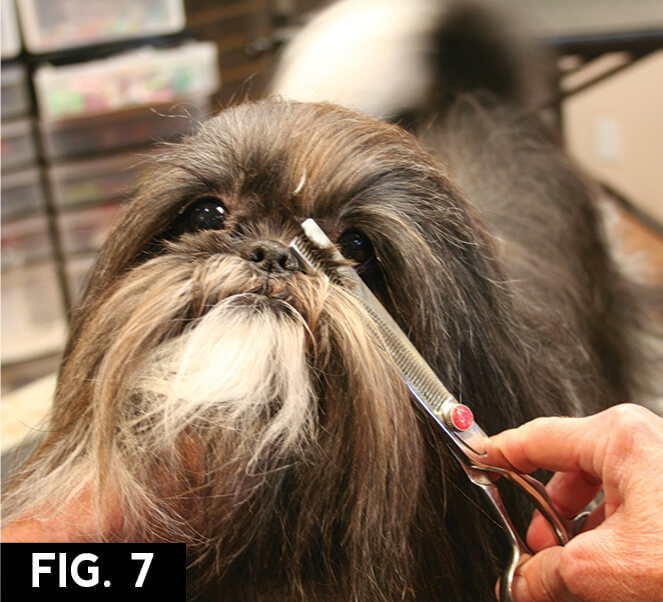
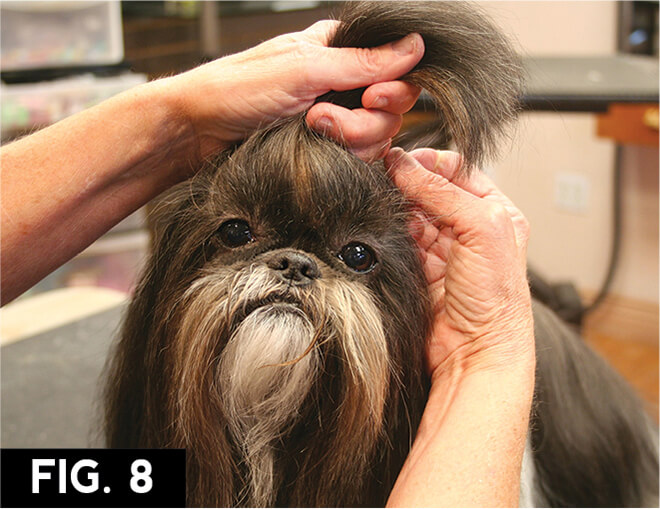
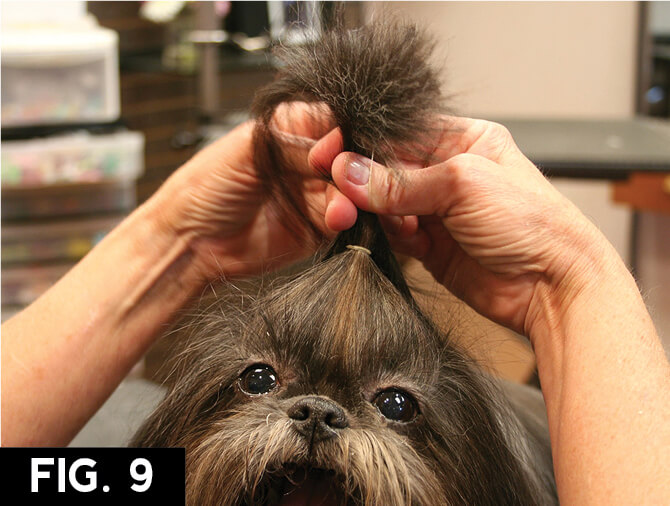
Fig.9) Next, grasp the second section of topknot coat and secure this to the front section, slightly above it. The front section is fuller than the back section. Use holding spray to shape the long coat of the topknot.
Use thinning shears to complete the styling by tidying the beard and ears.
At times our clients like a little added pizzazz and one way to accomplish this is with the application of a feather or colored hair extension.
Fig.10) Place the bead on the beading tool. Grasp a very small amount of coat with the tool and pull the hair through the bead.
Fig.11) Place the feather end into the bead.
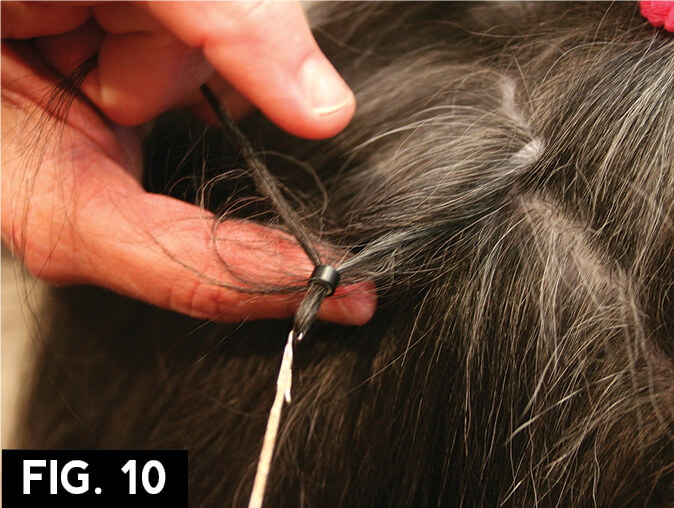
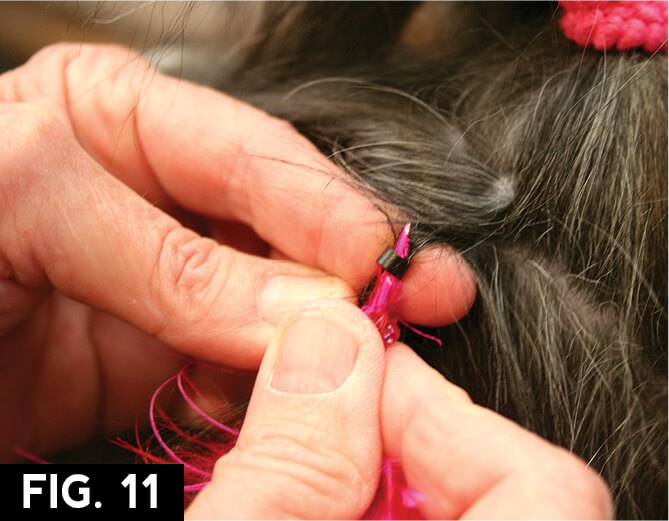
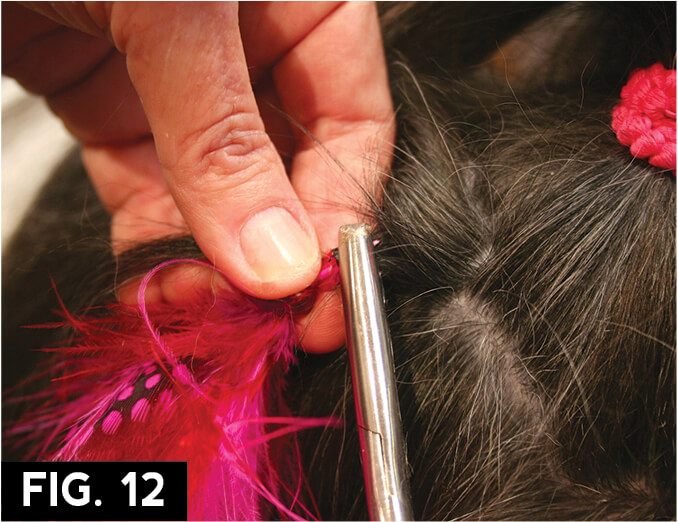
Fig.12) Squeeze the bead with hair crimpers.

Keeping current with styling trends and products is a great strategy to keep your Bread & Butter client list expanding. With that said, the most important client relation styling tools are your ears, brain, and voice. Listening to your clients, deciphering their descriptions of what they think they want, and keeping this communication open between you is key to keeping your clients happy.
For more information on feathers and other creative ideas: www.creativegroomersassociation.org