
By Kathy Rose
Poodles make up a large portion of our regular Bread & Butter client list. Most of these clients want an easy maintenance trim; the Poodle’s body trimmed to about an inch, with the legs being just slightly longer. For this model a “0” snap on comb placed over a “30” blade was used for the body. An “A” comb was used on the legs. These choices can easily be altered to accommodate the client, but we call this the short Lamb trim.

Keep in mind that the workhorse is the clipper. When following the directions below for scissoring, you are only tidying and shaping the coat, not taking off length.
As with every pet, good preparation is important. A thorough bath and conditioning with a quality pet shampoo, followed by blow-drying the coat out straight is imperative. Sanitary, nail trimming and ear cleaning are also completed prior to styling.

Fig.1) With the clipper blade centered on the eye, clip under the eyes following coat growth direction. The blade length and decision to either clip following coat growth direction or against coat growth direction is dependent upon the skin sensitivity of the dog. For this model, a #10 was used following coat growth direction on the foreface and cheeks and then against coat growth direction on the muzzle and lips.
Clip from the outside corner of the eye to the ear, again following coat growth direction. Turn the clipper in the opposite direction and clip the eye corners and stop. Stretch the lips back and clip the muzzle from base to nose tip.
Fig.2) Following coat growth direction, clip the throat necklace to a “V” stopping just below the Adams apple or the approximate length of the muzzle.
Fig.3) Grasp the feet and shave against coat growth direction up to a point just below the wrist bones.

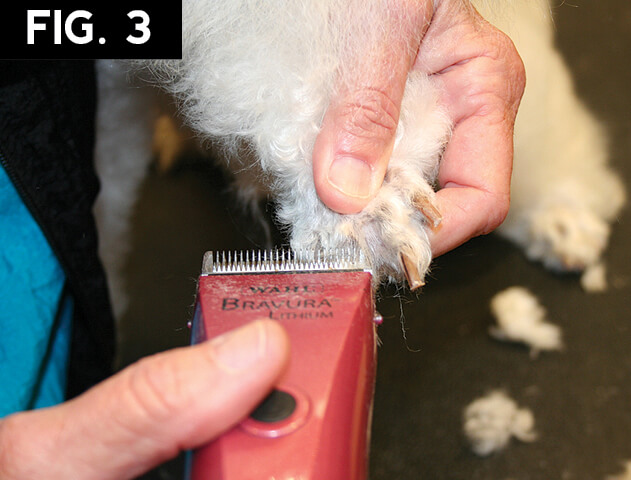
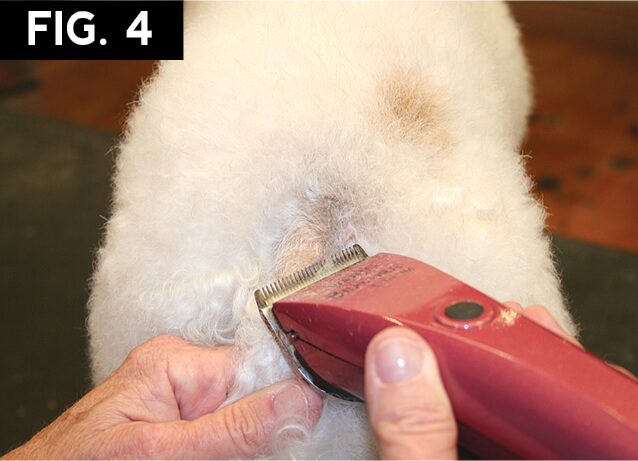
Fig.4) Trim the tail band to form an inverted “V”. The lower the tail set, the higher the band should be placed on the dog’s croup.
Begin clipping the body at the neck, a few inches below the occiput. Continue down the neck, back, flanks and undercarriage. A “0” snap on comb placed over a #30 blade was the choice for this model. If the dog has a large dip in the topline at the withers, Use a slightly longer snap on comb from the dip forward. This you will blend out later with scissors or thinning shears.
Fig.5) Continue with the same blade over the croup and back of upper thigh to a point about two inches above the hock. “Fall off” before clipping into the sides of the leg coat. Additionally if the dog is extremely high in the rear, you may use a shorter comb over the rump and croup.
Change snap on combs to an “A”. Clip down the inside and outside of the rear legs, falling off before clipping the lower front part of the rear leg coat.
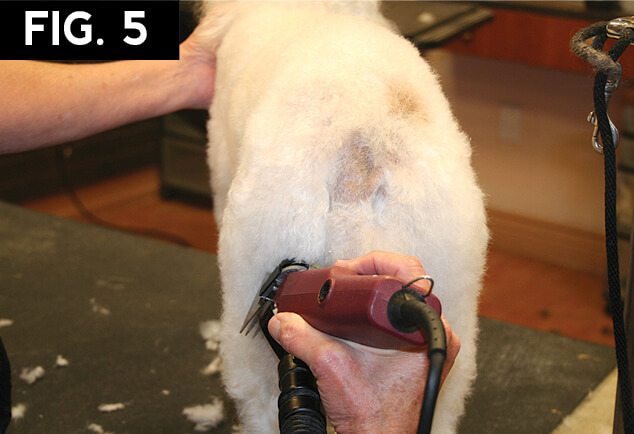
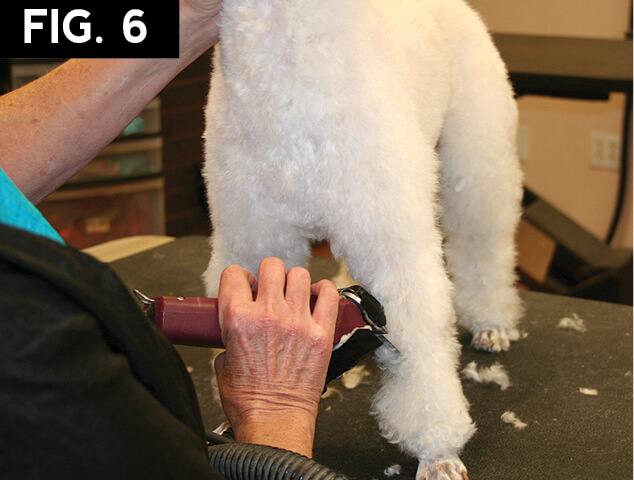
Fig.6) Move to the front of the dog and with the “A” clip down the front and sides of the front legs, falling off before clipping the back part of the foreleg coat.
Fig.7) Move to the rear of the dog. With straight shears, trim the tail band creating bevels at the edges. Use straight shears to create a level topline as well.
Fig.8) Use a curved shear, inverted, to scoop a modest tuck up. Flip the shears and follow the natural undercarriage all the way through the front legs.
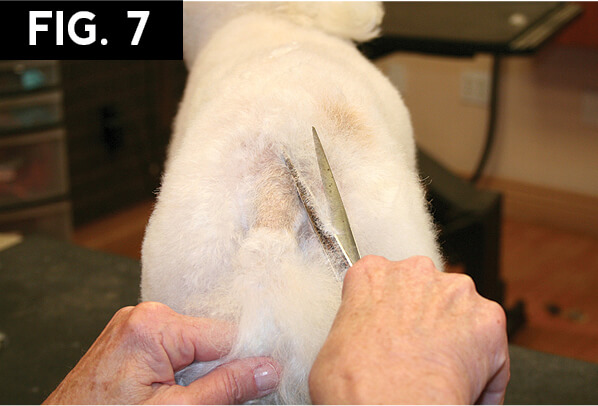
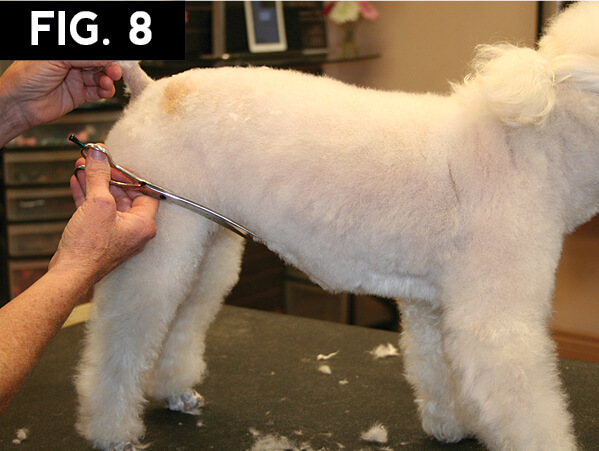
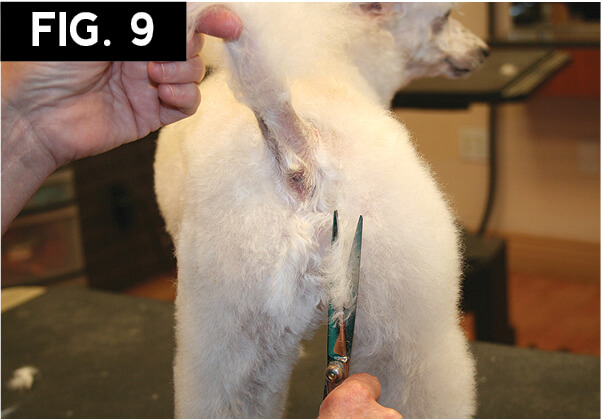
Fig.9) Trim the excess coat from under the tail and the upper thigh, using a curved shear. Continue tidying the stray hairs to create a curved hip and rounding the outer thigh. Use the curved shears in a scooping technique on the back of the thigh to just above the hock.
Continue with the curved shears, vertically, across the flanks. This will help reduce the chance of a “slab sided” appearance on the rib cage. To accentuate a moderate spring of rib you can use the curved shears to slightly tighten the waist. Use caution to not over do this as a “wasp” or over accentuated waist.
Fig.10) Tidy and shape the rear leg for angulation. Lift the leg up, bending at the knee and trim straight up to the bend in stifle. Then, turn the shears, while the knee is still raised and bent, and trim up to the tuck up.

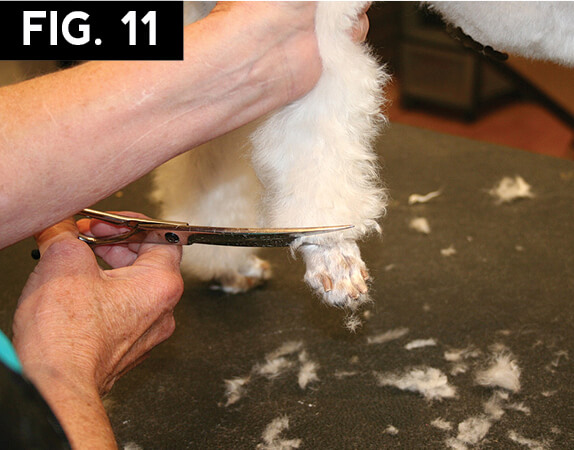
Fig.11) Trim around the bottom of the cuffs on the rear legs.
Fig.12) Grasp the tail and comb the tail coat downward toward the tip. Use curved shears to trim the ends. The amount of coat left at the tip will be determined by the length of the tailbone. The shorter the tailbone, the more coat should be left at the tip.
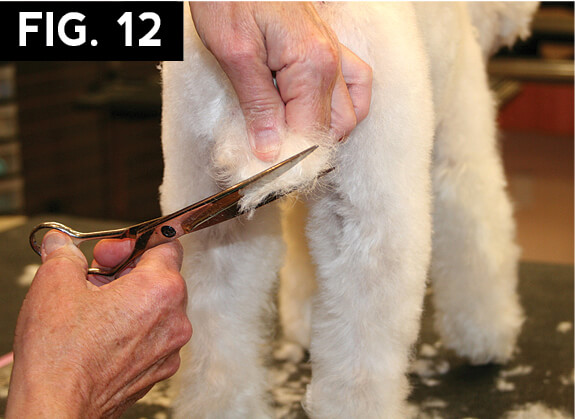
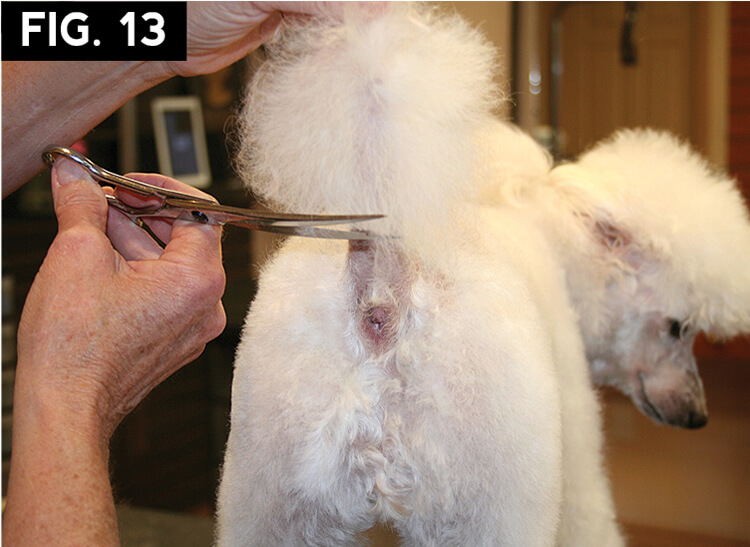
Fig.13) Lift the tail up, grasping by the tip. Comb the coat down toward the base and use curved shears to round the cuff of the tail. Finally, fluff the coat outward with your comb and use curved shears to create a round ball.
Fig.14) Move to the front of the dog. Use straight shears to bevel the necklace into the neck.
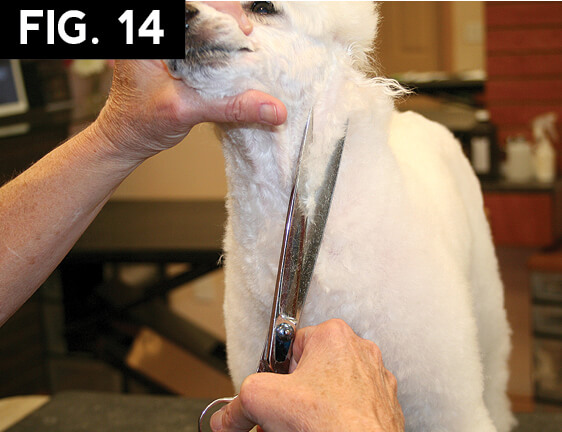
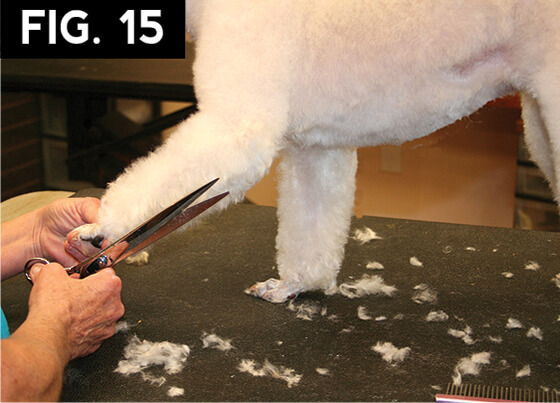
Fig.15) Standing to the front of the dog, slightly lift the foreleg straight forward. Tidy the sides of the leg to the back of the front leg. Place the foot back on the table and tidy the stray hairs to create parallel front legs. The illusion should be the back of the front leg running a straight line to the withers.
Fig.16) Begin trimming the topknot by creating a rectangular box. Start this box by placing long straight shears horizontally across the nose bridge. The shears should be angled slightly outward at approximately 45° to help create a shelf over the eyes.
Continue trimming the rectangular box by trimming across the top of the ear. Again, hold the scissors angled slightly outwards to avoid creating a cone head shape.
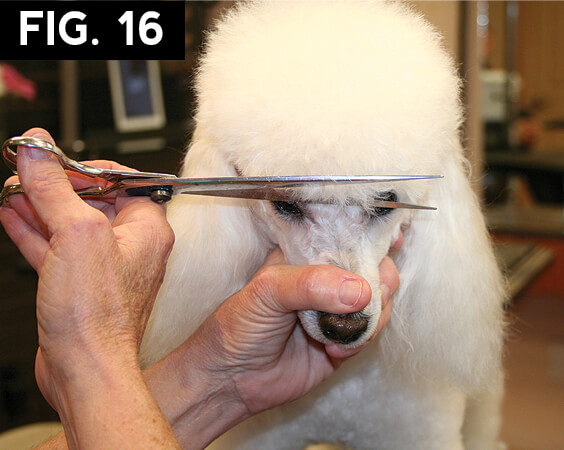
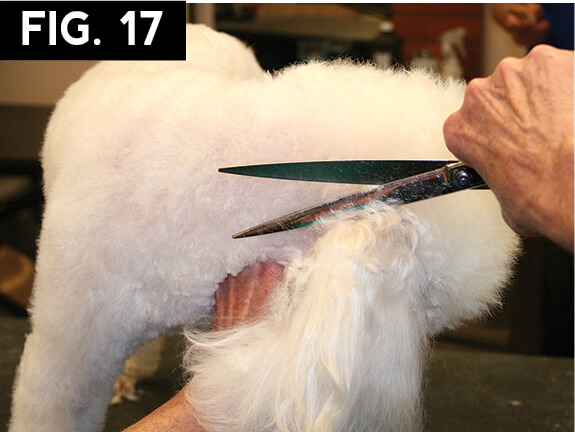
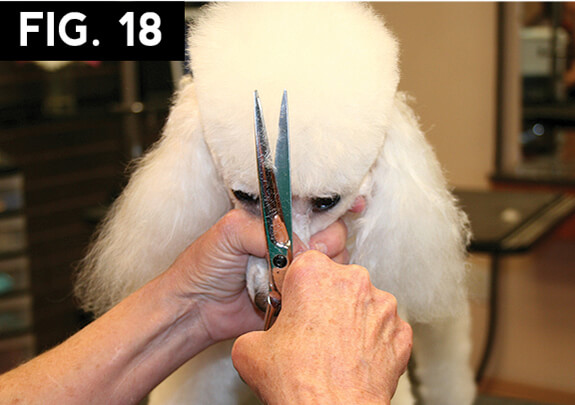
Fig.17) Continue across the top of the ear, and blend into the neckline. Use curved shears to blend from the occiput onto the neck.

Fig.18) With curved shears, round out the “box” to create a rounded topknot. Start at the foreface and then move to the sides of the “box” above the ear. Finally, blend the highest point, (just forward of the occiput) onto the upper part of the back of the neck.
Fig.19) Finish by combing the ears’ furnishings straight down and trim the edges. Whether to use curved shears or straight will depend on the client’s preference.
This “Poodle Trim” is a great short, but not shaved, trim style that is easily maintained by the client and still gives a bit more stylish look than the “Kennel Trim”, which is short all over.

Using a slightly longer snap on comb on the legs, and falling off on the front part of the rear legs and the back part of the front legs, will help you to keep the legs looking like parallel cylinders. This will also aid you in keeping the leg balanced from top to bottom and avoid a peg legged look.