
By Kathy Rose
The Yorkie is one of the breeds found most often on our Bread & Butter client list.

The trim styles are versatile and the coat types, body types, and sizes vary considerably on the pets that we encounter.
This version of a teddy type pet trim takes advantage of the silkier coat type, leaving a slight skirt following the outline of the dog. The round head opens the eyes and helps to enhance a cute expression.
Preparation is, as always, important. Shampoo, followed by light conditioning and a fluff dry will help this drop coat lay smoothly. Prep work such as pads, underwear, nails, and ear cleaning are completed prior to styling.
Fig.1) Support the back of the ear leather with your fingers and clip the inside and outside top ¼ to ⅓ of the ear, following coat growth direction.
Fig.2) Shave the upper and lower lips just under the nose.
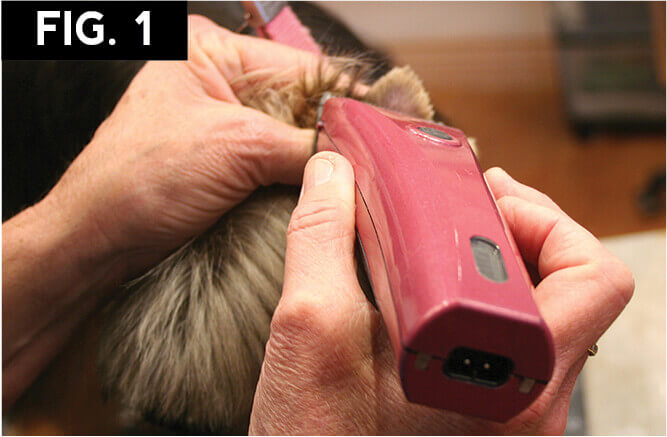

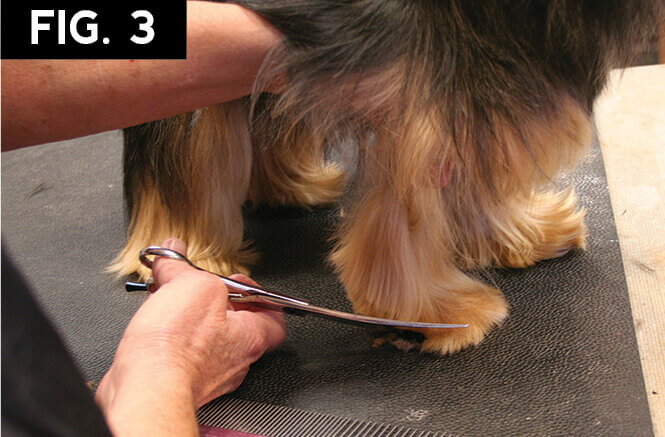
Fig.3) For the front legs, lift the long leg coat up and out of the way. With the foot on the table, round the foot using curved shears. Continue to hold the longer leg coat out of the way, then lift the leg slightly and round the foot. Comb the leg coat down and repeat.
Fig.4) For the rear feet, lift the leg slightly and round the foot.
Fig.5) From the back, lift the leg and trim around the bottom of the foot. For safety, in case the dog kicks, avoid placing the scissor blade across the pad.
Fig.6) Use a rattail comb to part the back coat. A greyhound or poodle comb, held on an angle as shown, will also work.
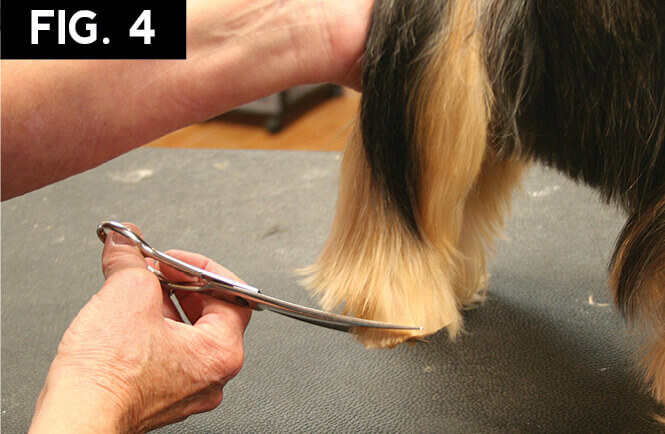
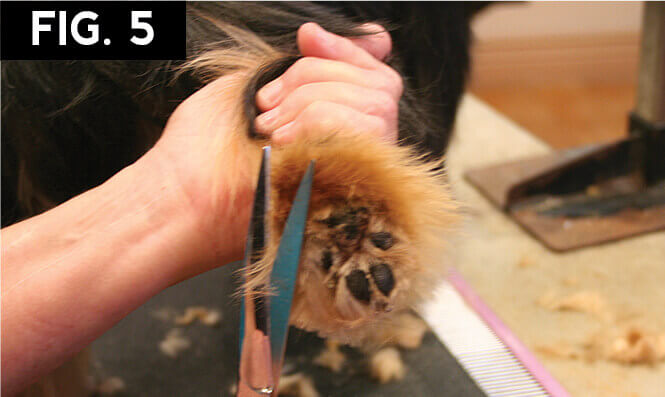
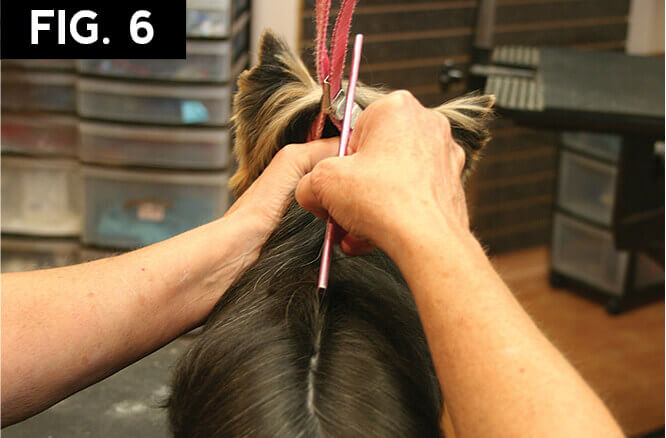
Fig.7) Use curved shears to trim the tuck-up. Lift the rear leg, showing the bend in stifle. Trim from foot to knee and then turn upward, angling toward the tuck up. When the leg is lifted in a natural position, the tuck up will be approximately where the knee hits the underline.
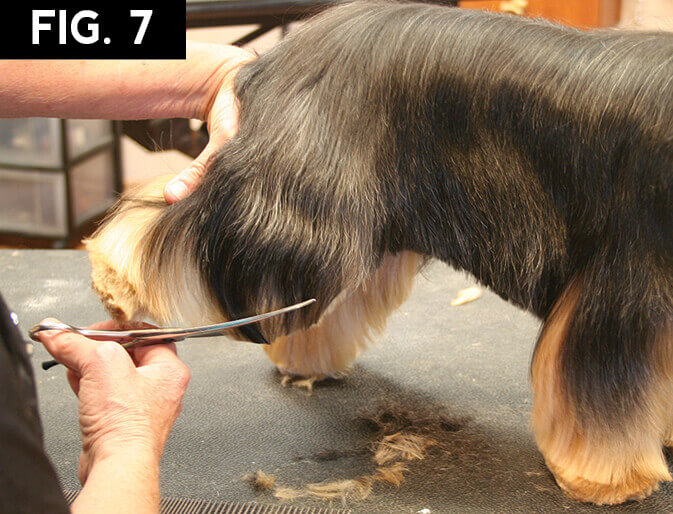
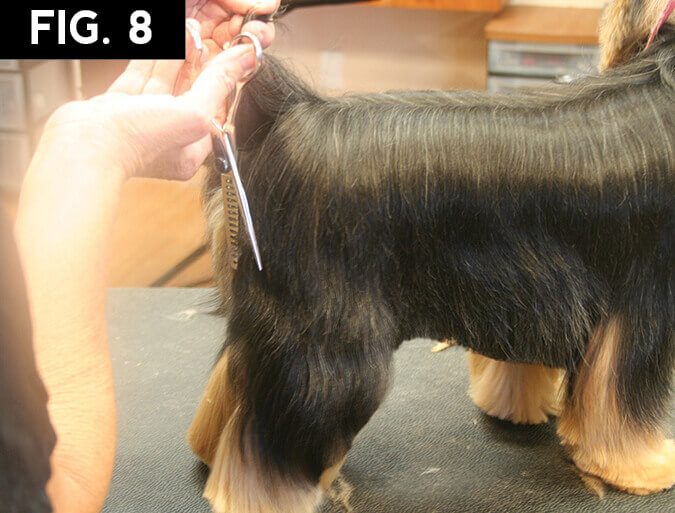
Fig.8) Use thinning shears to trim the back of the upper thigh. Trim to just above the hock; tidy from the hock down to the foot. Trim the tail to client’s preferred length.
Fig.9) Hold the ear upright; use small scissors to trim the outside ear fringe, starting at the cheek coat ending at the tip. Then trim the other side from just above the base to the tip. Both sides of the ear should have more fringe at the base, culminating into a point at the tip.
Fig.10) To finish the ear, fold the ear between thumb and finger tips then trim toward the tip.
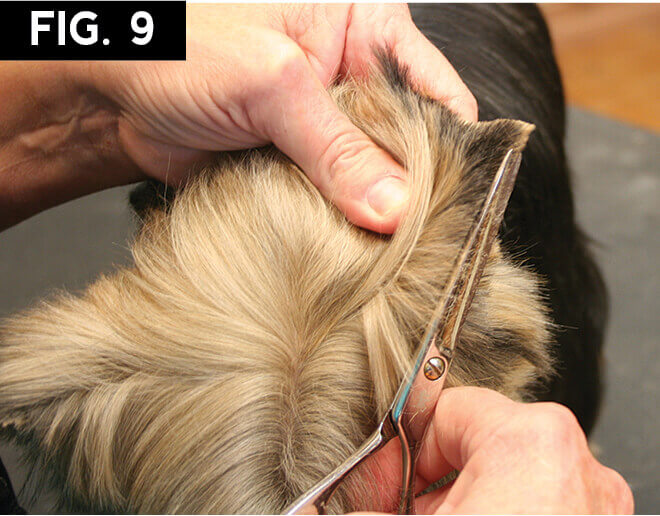
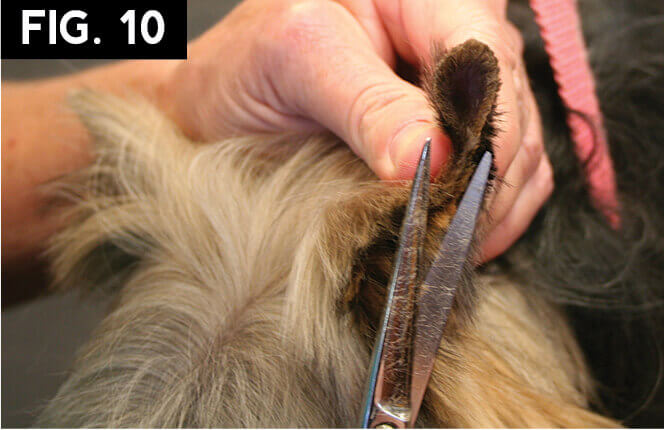

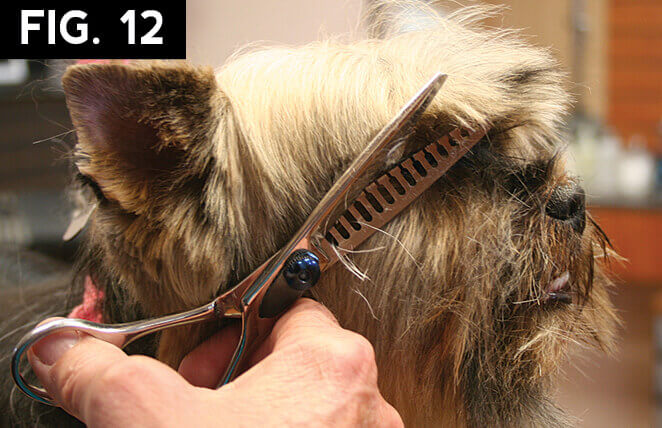
Fig.11) Use thinning shears to trim the eye corners; leave a small amount of coat on the stop.
Fig.12) Comb the topknot coat forward and use thinning shears or chunkers to trim from the outside corner of the eye toward the tip of the nose. Repeat on other side.
Fig.13) Comb the topknot forward, hold the chunkers at a 45° angle to the foreface and trim across.
Fig.14) Use curved shears to trim the beard from the nose, curving downward on the jawline. Follow the curve of the jaw upward to the longer fringe on the base of the ear.
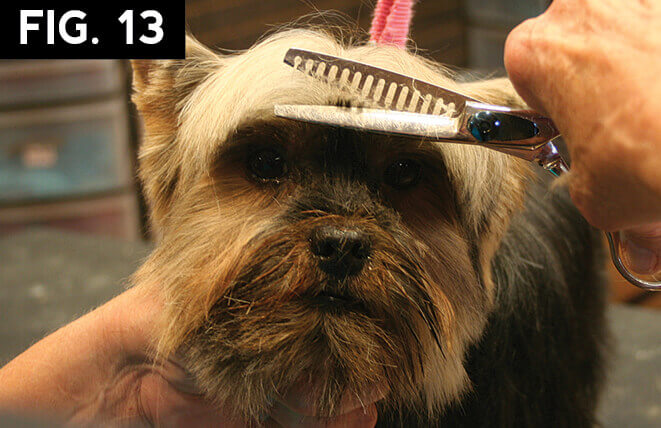
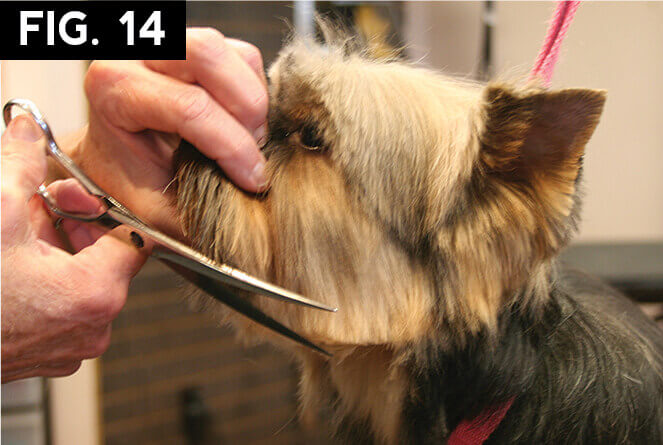
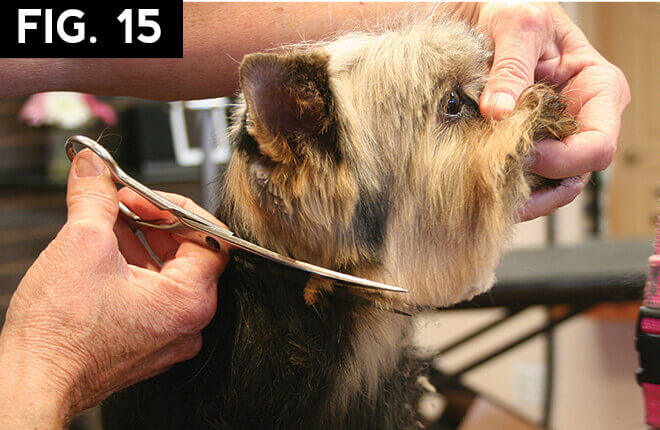
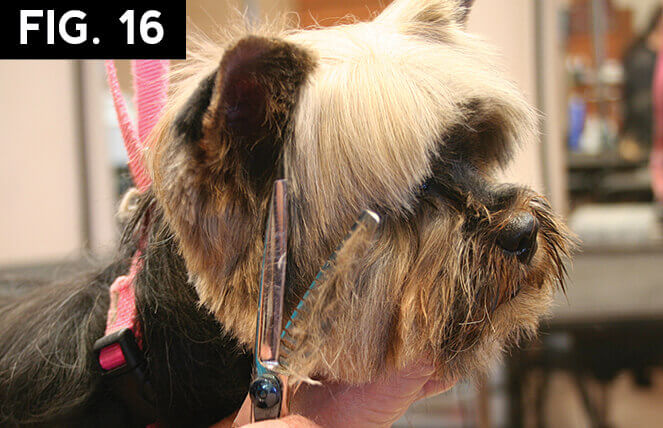
Fig.15) Repeat on the other side of the face, from back to front as shown.
Fig.16) Blend the cheeks with chunkers or thinning shears.
Fig.17) Blend the sides of the skirt with curved shears, thinning shears, or chunkers.
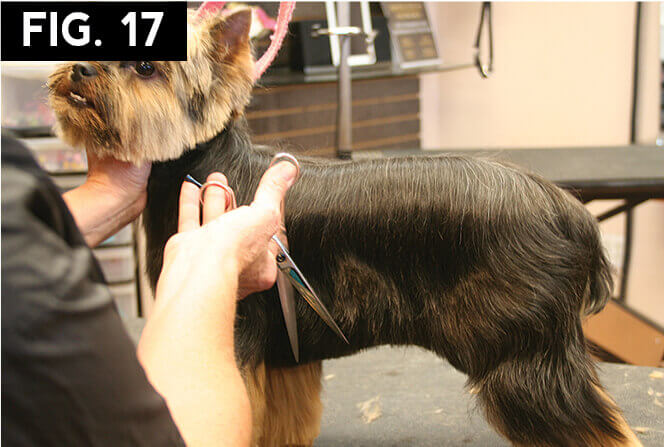
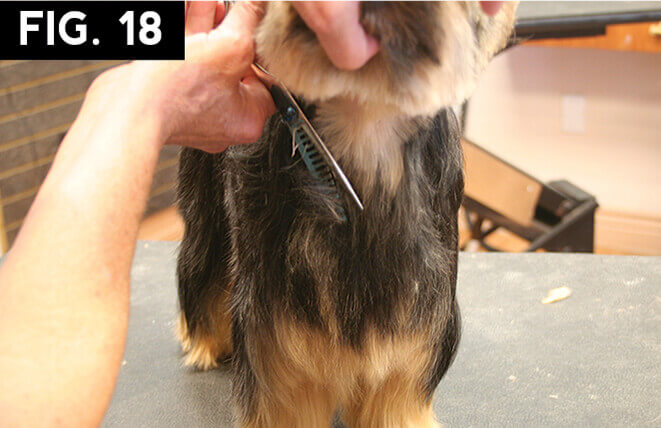
Fig.18) Blend the throat into the fore chest.

Clients love this longish type of trim style and it can be adapted to any drop coat breed. The key, as always, is communication with your clients. Excellent communication skills will keep your clients happy and your Bread & Butter list growing!