By Dawn Omboy
On Sunday December 11th 2011, I asked Jerry to tell me the story just one more time. I have heard it for 25 years and wanted to have it forever. Jerry sent me the words below in the form of a 3rd person bio and I want to share it with you, as this trim laid the foundation for Creative Styling as we know it today.
Given Jerry’s creative nature, it should come as no surprise that the seed of Creative Styling had been sown in his head early on. It germinated in his brain and was nourished by that goofy gray matter (Jerry’s a “wild and crazy guy”) until 1980, when he found a worthy sponsor willing to support his brainchild. For 5 years, Andis Co. offered a new Andis clipper and five blades for each of the competitors in the class, plus $1500 in prize money. Jerry was expecting some really exciting and creative trims that first year but was disappointed in the results. He shared these feelings with the first winner, Lynette Wallace Jacobsen, which made her a little angry but also challenged her. At the next show, which Jerry co-sponsored with Margaret Migliorini in Atlanta, GA, in May 1981, Lynnette was back with a vengeance. She executed a beautifully scissored, balanced, and symmetrical spiral trim that went from the back of the poodle’s head, several times around the body, and ended at the base of the tail. It looked like a corkscrew. It wasn’t until several years later that Lynnette confided to Jerry that the real name of her ‘Spiral Trim’ was ‘Screw You Jerry Schinberg!’ ”
The Spiral has continued to delight groomers to this very day and has been beautifully executed by many over the years. I have two versions on two very different breeds I would like to share with you today. Here are some easy instructions to follow so you, too, can be challenged by the God Father of Creative Styling.
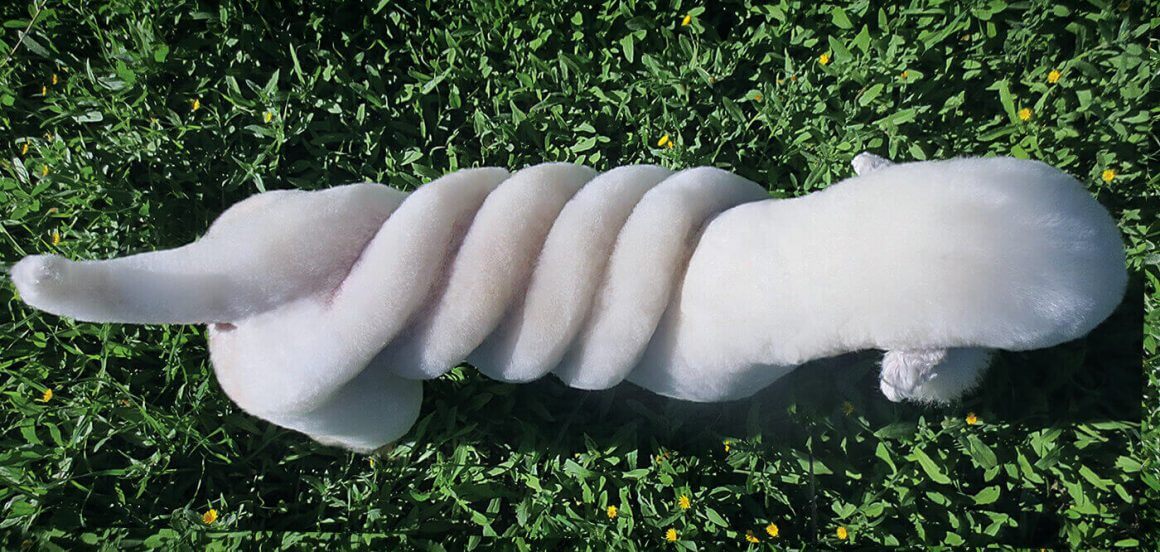
The first is from Isabella Jones of Spain, beautifully executed on a Standard Poodle.
Always begin with a clean, properly prepped coat.
Start by drawing an imaginary line around the dog’s body to simulate the placement of the lines. You can use your comb, tip of your shears, or even a string so you can easily move it until you are satisfied with your lines. Isabella likes to start at the front of her dog making sure the spiral comes to a perfect swirl at the end of the tail.

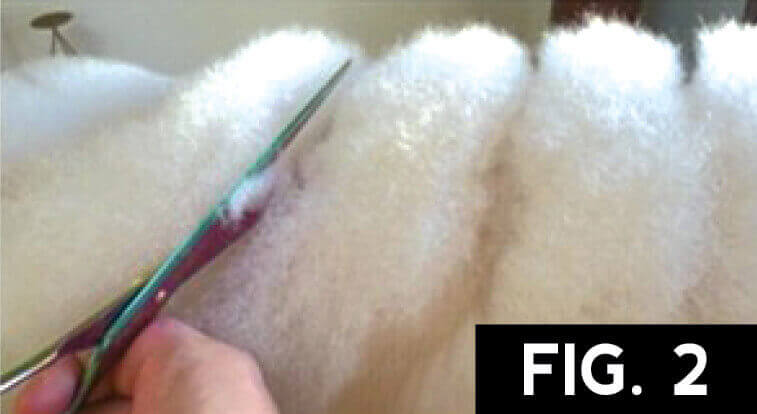
Fig. 1) With your lines marked, continue with a straight scissor and cut in the first line from the front of the shoulder up to the shoulder tip at a slightly sloped angle. The scissors must not go down to the skin. Continue down the left side of the dog marking in the lines.
Fig. 2) With this done, comb the coat toward the tail and go over the lines again without taking off too much at this stage but making sure you can clearly see your lines. Next, comb the hair towards the head and trim the lines again on this side making them perfect clean lines.
Comb all the coat outwards and upwards and, using a pair of curved shears, start shaping. The shape will depend on the look you want to achieve; make it your own style! By this time you and the dog should both take a break.
After looking at your dog on the floor you should be able to see your beautiful spiral really taking shape.
Fig. 3 & 4) Have the dog sit so you can see just where your lines are meeting up and look at him from above also. Now you can follow the lines from the back, down the right side of the dog, and repeat the same procedure as on the left side. Remember to go slow and take off a little at a time.

Charla Jenkins, owner of Charla’s Cuddley Cuts in Amarillo, Texas, also begins with a clean dog ready to finish. Her method is just a bit different and here she demonstrates the Spiral trim on a Pomeranian.
She begins by doing a rough-in, starting with the tail which also sets the width of her spirals.
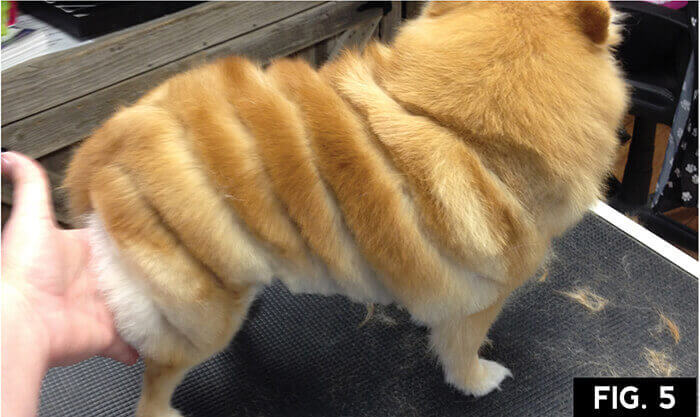
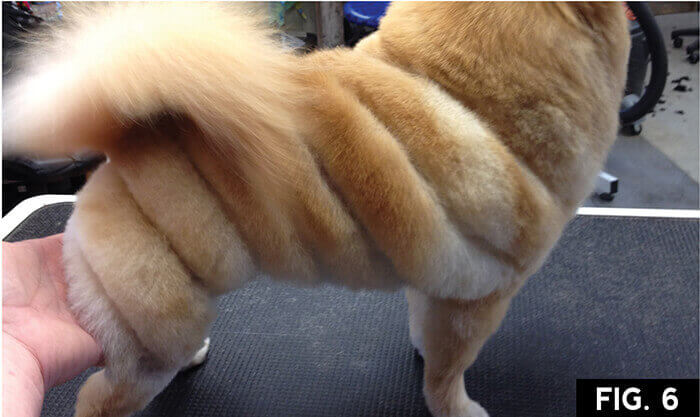
Fig. 5) Charla achieves the look with her exaggerated curved shears and follows the basic shape of the dog by cutting in a line going all the way around to the chest.
Fig. 6) Once the desired pattern is set, she then goes back over the swirl to round the edges and shape in the lines, again using her curved shears and holding them in an up/down position. After getting the rounded effect on the swirls, she then continues the task of fine tuning in between lines, still using her curved shears, but holding them in a flat position.
Fig. 7) The Finished groom is fun and will hold up nicely during the grow-out.

So no matter the breed or which end of the dog you begin with, you too can achieve this timeless creative classic. And if you like, add some color! Jerry was a one of a kind guy, it was such an honor to know him. ✂
Making the World more Colorful, one dog at a time… Queen of Color
Dawn can be contacted at www.queenofColor.com for story ideas and comments or questions.