By Kathy Rose
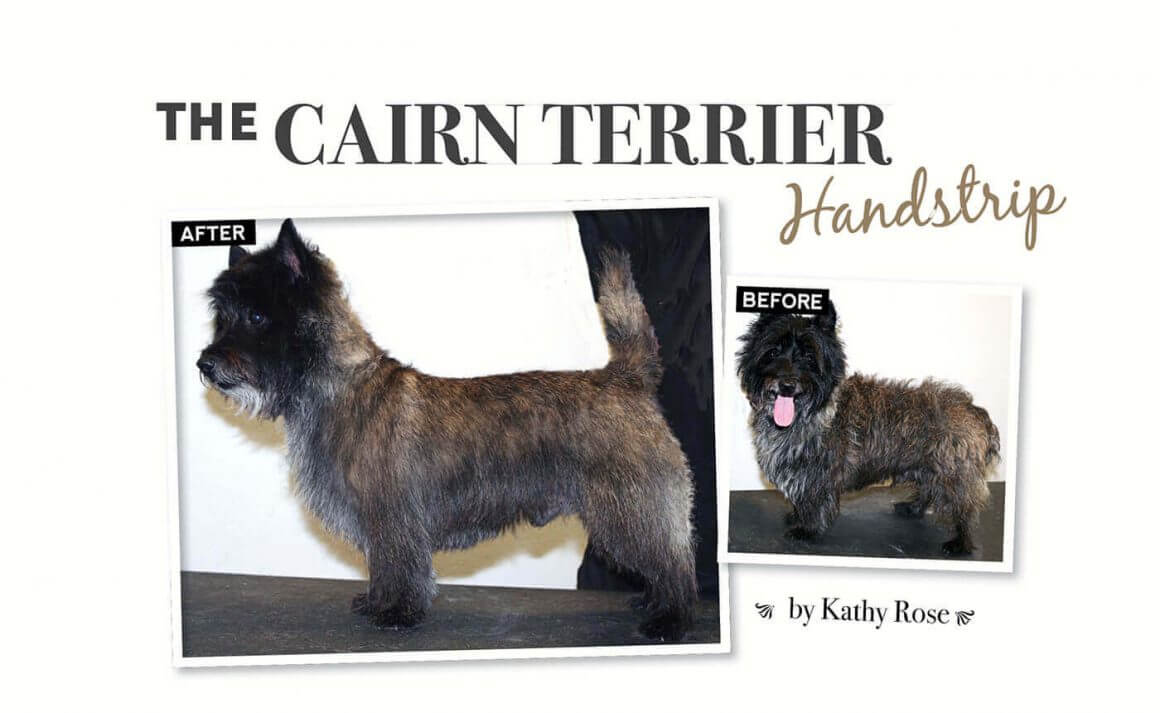
Cairn Terriers rank somewhere mid–range of all breed registrations with AKC. Even though not a common breed, Cairn Terriers have graced the silver screen as far back as the mid 1930’s, making notable appearances in dozens of films along side such blockbuster stars as Shirlee Temple, Judy Garland, John Wayne, and Nicole Kidman, to name a few. Cairns certainly earn a spot on a groomer’s Bread & Butter list.
Many of the techniques shown can be used for show dogs, however this segment is geared towards making the pet look their best. The model, although formerly shown, is a pet. Handstripping will help to keep the rich color and harsh texture and provide natural looking, easy to maintain coat that is wash and wear. Although not ideal, thinning shears may be used to help with blending and provide a neat outline.
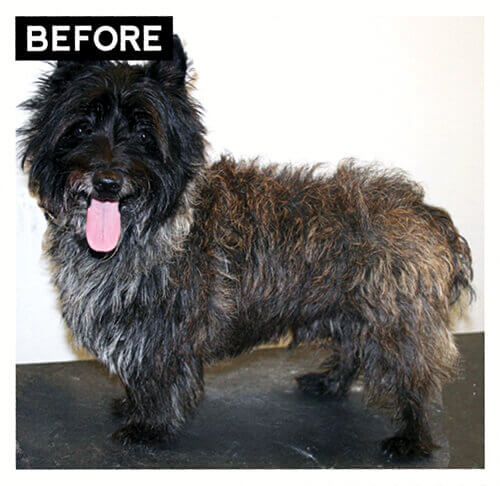
When employing handstripping and carding techniques, best results are achieved when completed prior to the bath. Pads, sanitary, nail trimming and ear cleaning are all part of the prep work. A pet that is handstripped may not even require bathing, but our Bread & Butter clients usually prefer a freshly washed pet upon pick up. Use a quality conditioning shampoo and dry the coat to lay flat, following the coat growth direction. You can then make quick work of completing the groom by detailing.
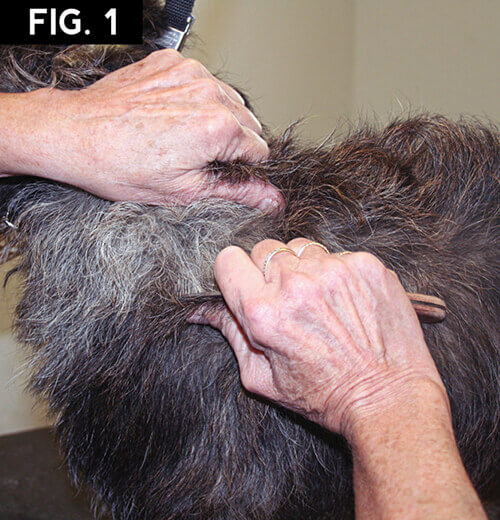
Fig.1) Begin the handstripping process at the shoulder, throat and fore chest. Secure the loose skin on the sides of the neck and strip following the coat growth direction. It is important to hold the knife perpendicular to the coat while stripping. Angling the blade while stripping, unlike carding undercoat, will cut the coat. On a blown coat such as this one, almost all of the coat must come out as it is dead coat.
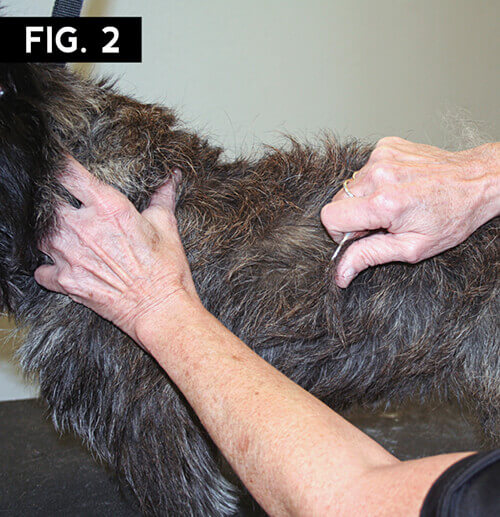
Fig.2) Next, strip the side coat at the flanks and loin.
Fig.3) Check your knife after pulling a section of the longer, dead coat to insure you are not cutting coat. You should observe long coat on both sides of your thumb. If it is shorter on the teeth side, then you are cutting the coat.
Fig.4) Next, strip the upper, outer hips and thigh.
Fig.5) Form a ledge from the pin bone (point of rump), to the hip bone. Leave a fill at the croup to blend the tail in an unbroken line onto the back.
Fig.6) The topline is the last part of the jacket to strip. This way it is easier to make corrections in the topline as needed, to form a level topline. Additionally, I have found that the topline is the least sensitive area so when the pet’s patience is waning, save the easiest for last.
Fig.7) Blend the croup onto the tail and strip the tail into a carrot shape. Tip: When grabbing the coat between blade and thumb, let the coat slide through your fingers and the knife blade so only the longest dead hairs are removed.
Fig.8) Use a rake or Coat King to remove excess undercoat on the entire jacket. I prefer to do this step after stripping, however it is sometimes beneficial to rake periodically throughout the process.
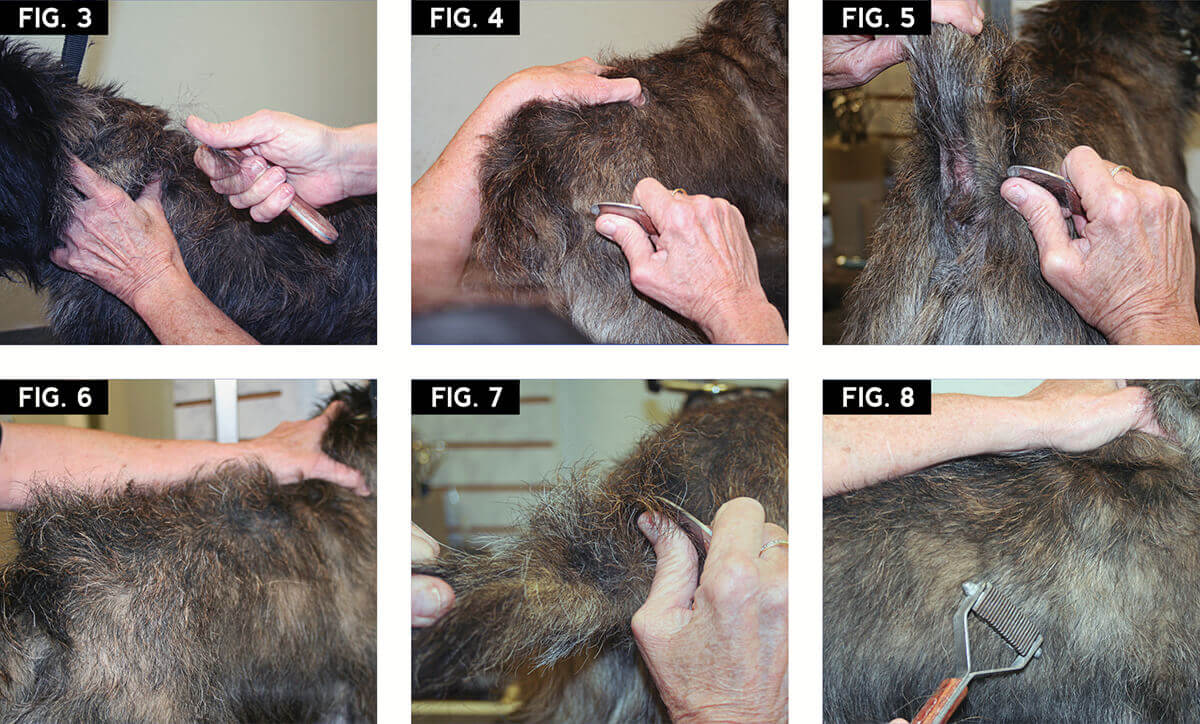
Fig.9) The rake will help remove excess soft, dead undercoat. You can then use your fingers to fine–tune the outline.
Fig.10) Use your fingers to define the shoulders.
Fig. 11) Lift the front leg and, using your fingers, pull out the longer dead coat on the sides and back of the leg. Note the lighter colored dead coat.
Fig.12) Use your fingers to shape the rear legs and the rear, removing the soft lighter coat.
Fig.13) Use your fingers to shape the underline to follow the natural undercarriage of the dog.
Fig.14) Comb the coat on the head, up and out. Remove the longer dead hairs to shape a roundish shaped head.
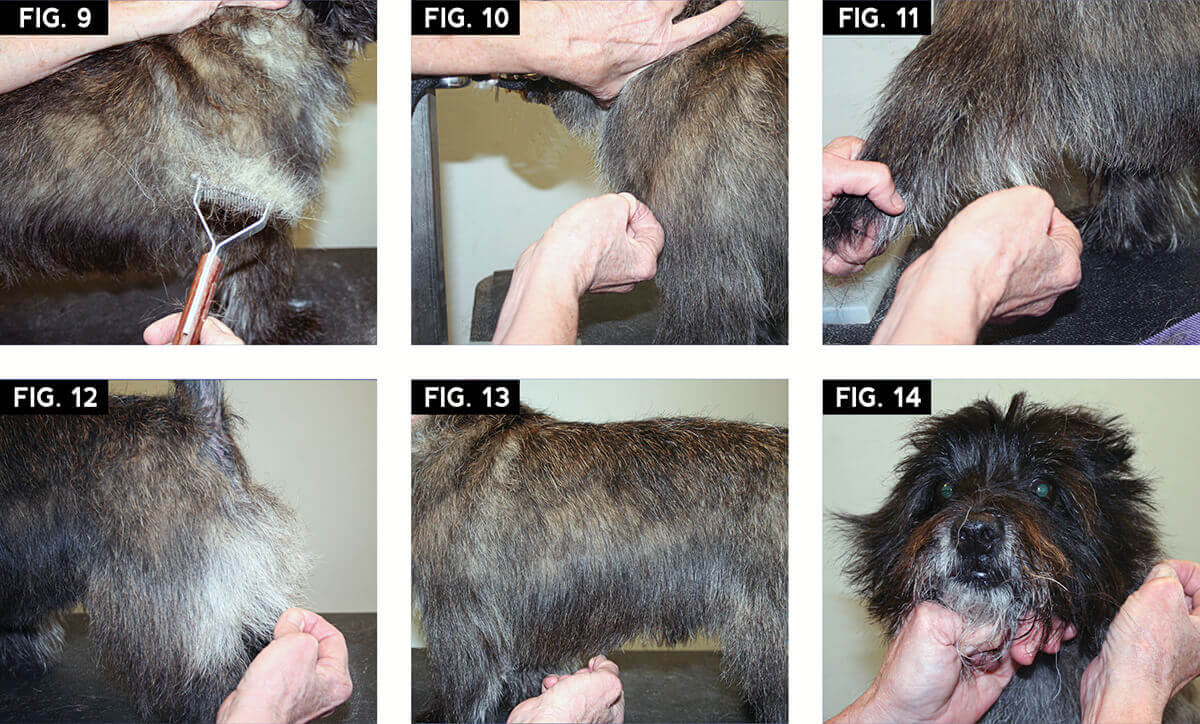
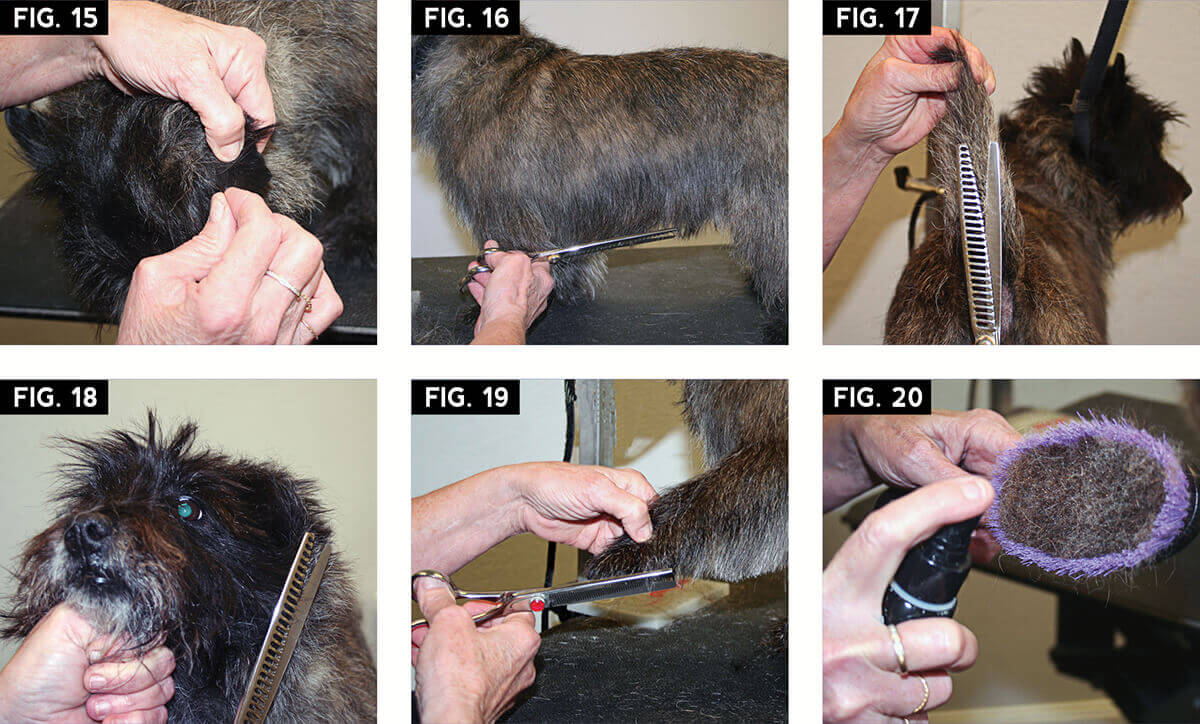
Fig.15) Pluck the wire coat from the top ¼ to ⅓ of the ear. Then use a fine carding knife to strip the ear tip.
Fig.16) Use chunkers or blending shears to tidy and shape the underline.
Fig.17) Use chunkers or blending shears to clean up the tail.
Fig.18) Use chunkers or blending shears to lightly shape the head. It should appear natural, not sculpted.
Fig.19) Use a fine thinning shear to shape the feet to appear round
and tidy.
Fig.20) Finish with a light conditioning spray applied to a firm brush. Brush in the coat growth direction, starting at the top of the neck and continuing down the back and flanks.
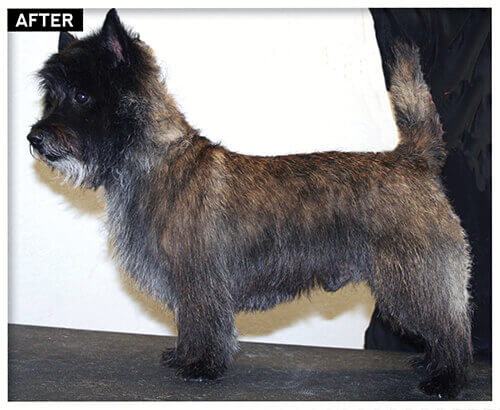
After the bath, finish up with some touchup work and blending. Complete the groom with a light misting of conditioning spray. Then following coat growth direction, smooth the body with a soft bristle brush.
For more information about the Cairn Terrier: Cairn Terrier Club of America www.cairnterrier.org ✂
Kathy Rose was a medalist on GroomTeam USA on four medal winning teams. She is an educator and contest judge across the globe. Kathy’s salon, Pets of Perfection in Boynton Beach, Florida has adorned the cover of Groomer to Groomer Buyers Guide and is a four time nominee for salon of the year. Kathy is the Barkleigh judging and contest coordinator, Master of Ceremonies for the grooming contests at World Pet Association shows and a board member of GroomTeam USA. Kathy is a regular columnist for Groomer to Groomer magazine.