
By Kathy Rose
Often described as the oldest breed in Scotland, the Scottie has found his way into the hearts of Americans, including two U.S. presidents, and onto the growing list of our Bread & Butter clients. His harsh, wiry coat is preferably hand-stripped to maintain the “wash and wear” functionality, but that is not always practical for the average pet owner. Clippers can replace the hand plucking, but the lines of correct breed profile and keen expression should remain intact when styled by a professional.
The first step in any groom is to evaluate fully the body structure of the dog: his conformation. There are planes, lines, and angles everywhere on the dog: the skull, jaw, ear set, tail set, front assembly, rear assembly, underline, and topline to name a few of the obvious ones.
When styling the “lines,” the topline is a good place to start, because it is the most easily identifiable line. In this case, we are seeking level, so where you begin to clip can make or break your final outcome.
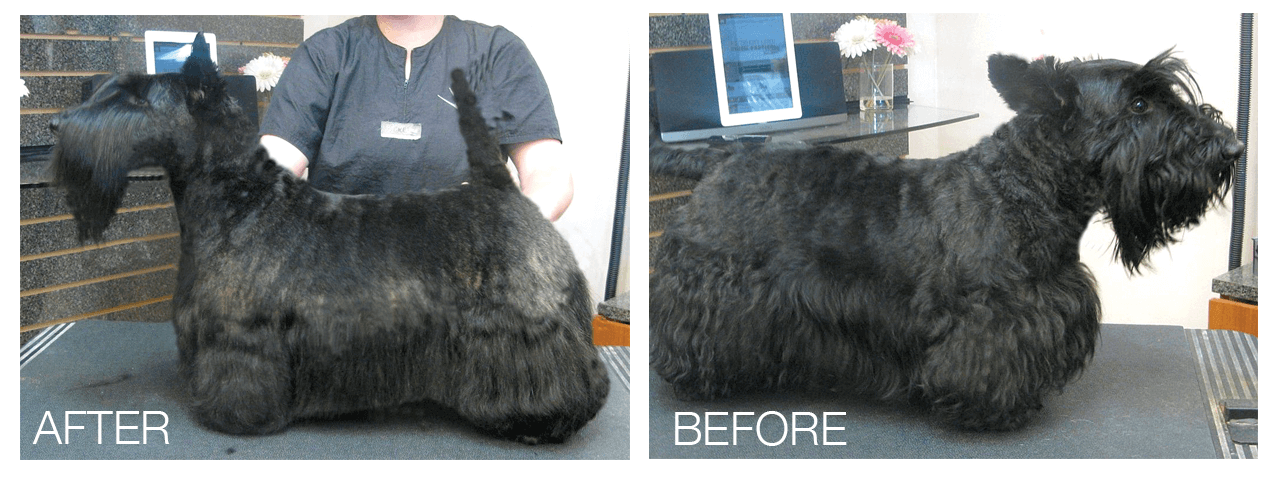
This B & B client is a lovely specimen, although he is losing the battle of the bulge. The extra pounds tend to raise his rump and leave a slight dip behind the withers. For this model, a #4 blade was used on the body, and then the highest part of the rump was blended over with a #5. For a pet with a roached back, you would use the shorter blade on the highest point of the back.
When using clippers on coats that normally should be carded or stripped, first card out the excessive undercoat with a coarse stripping knife or Furminator tool. This will help minimize the “corduroy” look the clippers sometimes leave.

Fig. 1: With a #4 blade, begin the clipper work a little behind the withers. (Tip: for very coarse coats, the skip tooth blades work well.) This will give you room to fill that dip. Following the coat growth direction, clip down over the point of shoulder and onto the upper arm, “falling off” before clipping into the longer leg coat. Continue down the back and flanks, clipping just below the “spring of rib,” the widest part of the rib cage.
Fig. 2: Clip the back and over the upper thigh muscle and rear, stopping just above the point of rump. Trim all sides of the tail, leaving a small triangle of coat at the croup with the widest at the tail base and the point forward to the back. This coat will be blended for a smooth transition from the onset of the tail to the back.
Moving to the front of the dog, change to a shorter blade (in this case, a #5). Still following coat growth direction, clip the sides and front of the neck over the shoulder and down to about two fingers above the breastbone.
Fig. 3: Using a #5 or #7, clip the throat, cheeks, and jaw in reverse against the coat growth direction. Blade length depends upon the dog’s skin sensitivity, pigment and coat density. (You do not want this to look bald.) Clip from just in front of the ear to the eye corners on the upper cheek. Do not clip under the eyes. Clip to the hair nodule or lip corner on the lower cheek and under the jaw. The facial coat starts at the eye corner and angles diagonally downward toward the jaw.
Clip the topskull against the coat growth direction, starting in front of the ear, and clip down to the stop. The space between the eyes (stop) should follow the natural channel that lies there or about the width of a finger. Do not shave down the nose bridge. Use scissors, thinning shears, or hand pluck the stray hairs in this area. Do not shave off the tuft between the ears. With low set ears or a domed topskull, you may need to extend the tuft a bit more onto the topskull. Leave a small bit of coat in front of the ear as well.

Change clipper blades to a #30. Clip the entire back side of the ear, leaving a very small amount of coat at the ear base to blend where it sets onto the head. Next clip the entire outside on the ear front. Clip the inside (toward the topskull) of the ear, leaving fringe on the bottom two-thirds. Do not leave any fringe on the outside edge of the ears. The ear fringe or “tufts” are an extension of the inside edge of the ears, which helps create the illusion of a narrower space between the ears, enhances the appearance of a flat top skull, and buffers the ear canal opening. The amount of fringe left on the topskull and inside ear edge will depend upon the skull shape and width.
Fig. 4: With a #5, clip against the coat growth direction in a slight arch curving up toward the ear base on the sides of the neck. This is a short cut to blend the shorter throat and shoulder into the coat on the back of the neck. This will help to give the appearance of an arched neck.
Fig. 5: With small scissors, trim the outside edge of the ear from the base to the tip. Do not leave any fringe on the outside edge.
Fold the ear over and trim the fringe on the inside of the ear to blend into the smooth edge of the ear toward the tip.
Fig. 6: Use thinning scissors to blend the slightly longer coat on the back of the crest to the topskull and neck.

Fig. 7: Place fine thinning scissors or a straight shear flat against the cheekbone and trim the brows from the eye corner toward the nose. With short shears, trim the eyelashes short. Trim any brow coat that protrudes outward from the cheek. The brows should form triangles reaching about two-thirds of the way down the muzzle, depending on the length of the muzzle. The shorter the muzzle, the shorter the brow should be. They should be open enough to expose the eye but thick enough to give the impression of a deep-set eye.
Fig. 8: Use fine thinning scissors to blend the upper beard to the cheeks and the stray hairs between the eyes. When viewed from the front, the head should appear rectangular with no hairs protruding from the sides of the ear, brow, cheek, or beard.
Use curved shears to create round feet that bevel into the longer leg coat. Try not to expose the front toenails. With thinning scissors, shape the leg to the elbow for a definition from the skirt. Blend the upper forearm and shoulder. Use your thinning scissors to create a straight line from the shoulder to the foot and a cylindrical-shaped leg.
Fig. 9: Use long curved shears to give a slight “tuck-up” to a tidy underline. The slight tuck-up is placed a bit behind the last rib. Another way to find the correct spot is to lift the rear leg forward, bending the knee. Approximately where the stifle bends at the skirt is where to place the tuck-up. Tidy the rear leg outline by bending the knee, but do not trim above the knee.

Fig. 10: With thinning scissors, blend the stray hairs on the tail into the shape of a carrot and blend the slightly longer coat at the croup to blend onto the back. The tail does not have a flag or fringe.
Blend all transition lines from short coat to long coat with fine thinning scissors. Finish up the trim by again carding out excessive undercoat. This will give a nice smooth finish. A small bit of holding spray or gel applied to the brows will polish the crisp brow expression.
“The principal objective must be symmetry and balance without exaggeration.” This quote, pilfered from the Scottish Terrier Club of America Breed Standard, holds true in grooming as well. Recite this mantra when styling all of your Bread & Butter clients no matter what the breed!
For more information on the Scottie, visit www.stca.biz.